

How to Add One-Click Login With Google in WordPress
Introduction
Do you need to add a one-click login with Google to your WordPress website? Allowing the user of the site to log in with their Gmail account avoids much more time for the user because they would not have to remember their WordPress username and password each time they try to log in.
In the article, we have covered the steps to enable a one-click login for your WordPress site, hope it will be helpful for you.
What is One-Click WordPress Gmail Login?
You have probably seen the feature of “one-click login” before, even if you are not aware of the term. A one-click Gmail login is where to third-party website uses Google to verify your identity and give you access to its content. In this case, your WordPress website is the third party. There are several profits to using a one-click feature. The first one is you can log in easily.
It helps to speed up your login process significantly and lets you access the content in only a single click. This is also helpful for an organization with several WordPress users, One-Click login also verifies and helps to identify with Gmail hence preventing fraud. The One-Click login may help to improve you are security.
If you use a complex password which is one of the best ways to secure an account you need to admit it is also hard to remember. In this way, you can set the lengthy or complex login details for your WordPress and can able to login in with just a click without having to remember or type it every time.
On the topic of security, might be you have doubts regarding third-party integration that will make your site more exposed. But the good thing is that a single login process is the more secure one.
The process operates on the open protocol OAuth, and Google itself supports the most common OAuth scenarios. However, it is important to stay on top in the perspective of security. We recommended making all WordPress software, plugins, and themes up to date.
How to Add One-Click Gmail Login to Your WordPress Website (In 4 Steps)
If you’re interested in a single login process, you can add a one-click Gmail option in WordPress by following the below four steps.
Step 1: Choose a Plugin to Facilitate the WordPress and Gmail Integration Process
To start with this you need to choose the right tools. A one-click Gmail login can be quite simple to add. However, you will need to add a plugin to help you get this done. There are several quality choices available, but for this walkthrough, we will be using a Google Apps Login.
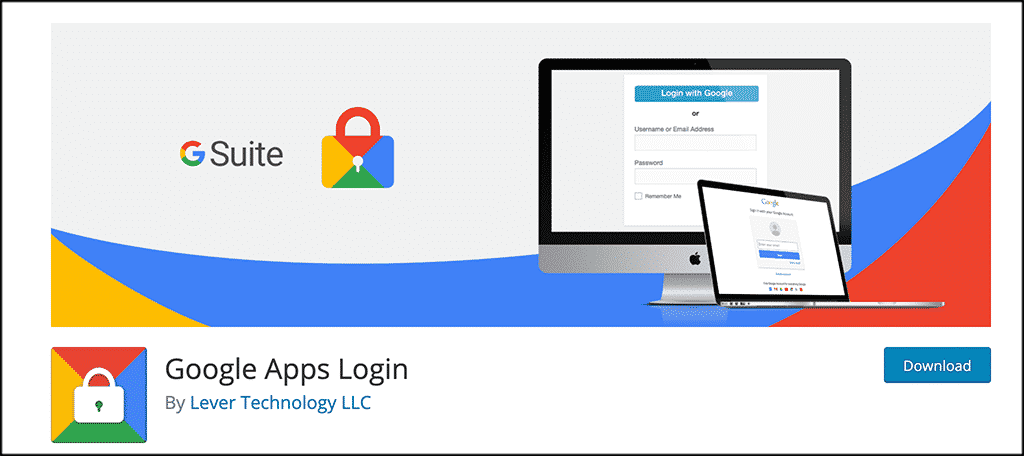
This plugin is simple to use and effective. Additionally, this Google Apps Login is suitable for regular Gmail accounts and for Google Workspace. This plugin offers a premium version also.
The license of Google Apps login starts from $29 for a single site and also offers extra features like requiring a user to log in through Gmail. However, there is no need to take a license version, you need the free version to follow this tutorial.
Step 2: Create a New Project With Google Cloud Console
In the second step, Need to set up the information on the Google Cloud Console page. You need to open the console page to get started. Once open navigate to the upper-left corner and click on “Select Project”. It will open the pop-up like below.
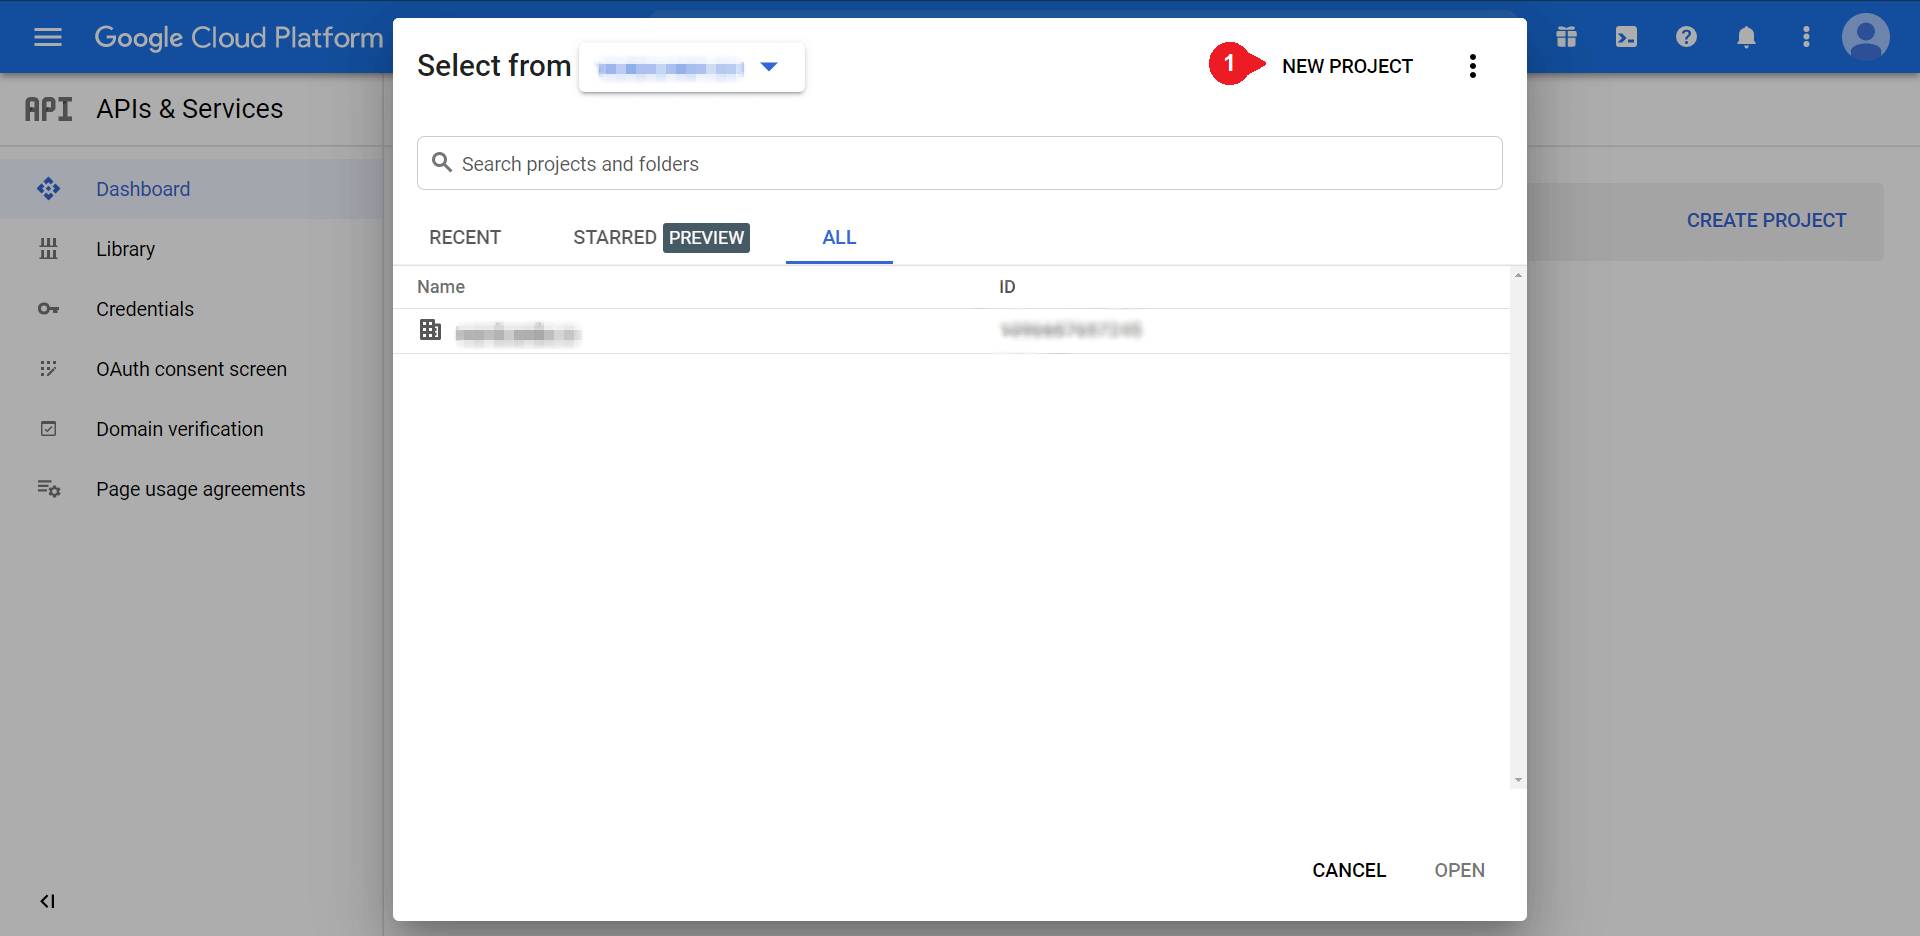
In the next click on the “New Project” which is in the upper-right corner of the page. This will navigate you to the creation screen. From there, you need to fill in the form details.
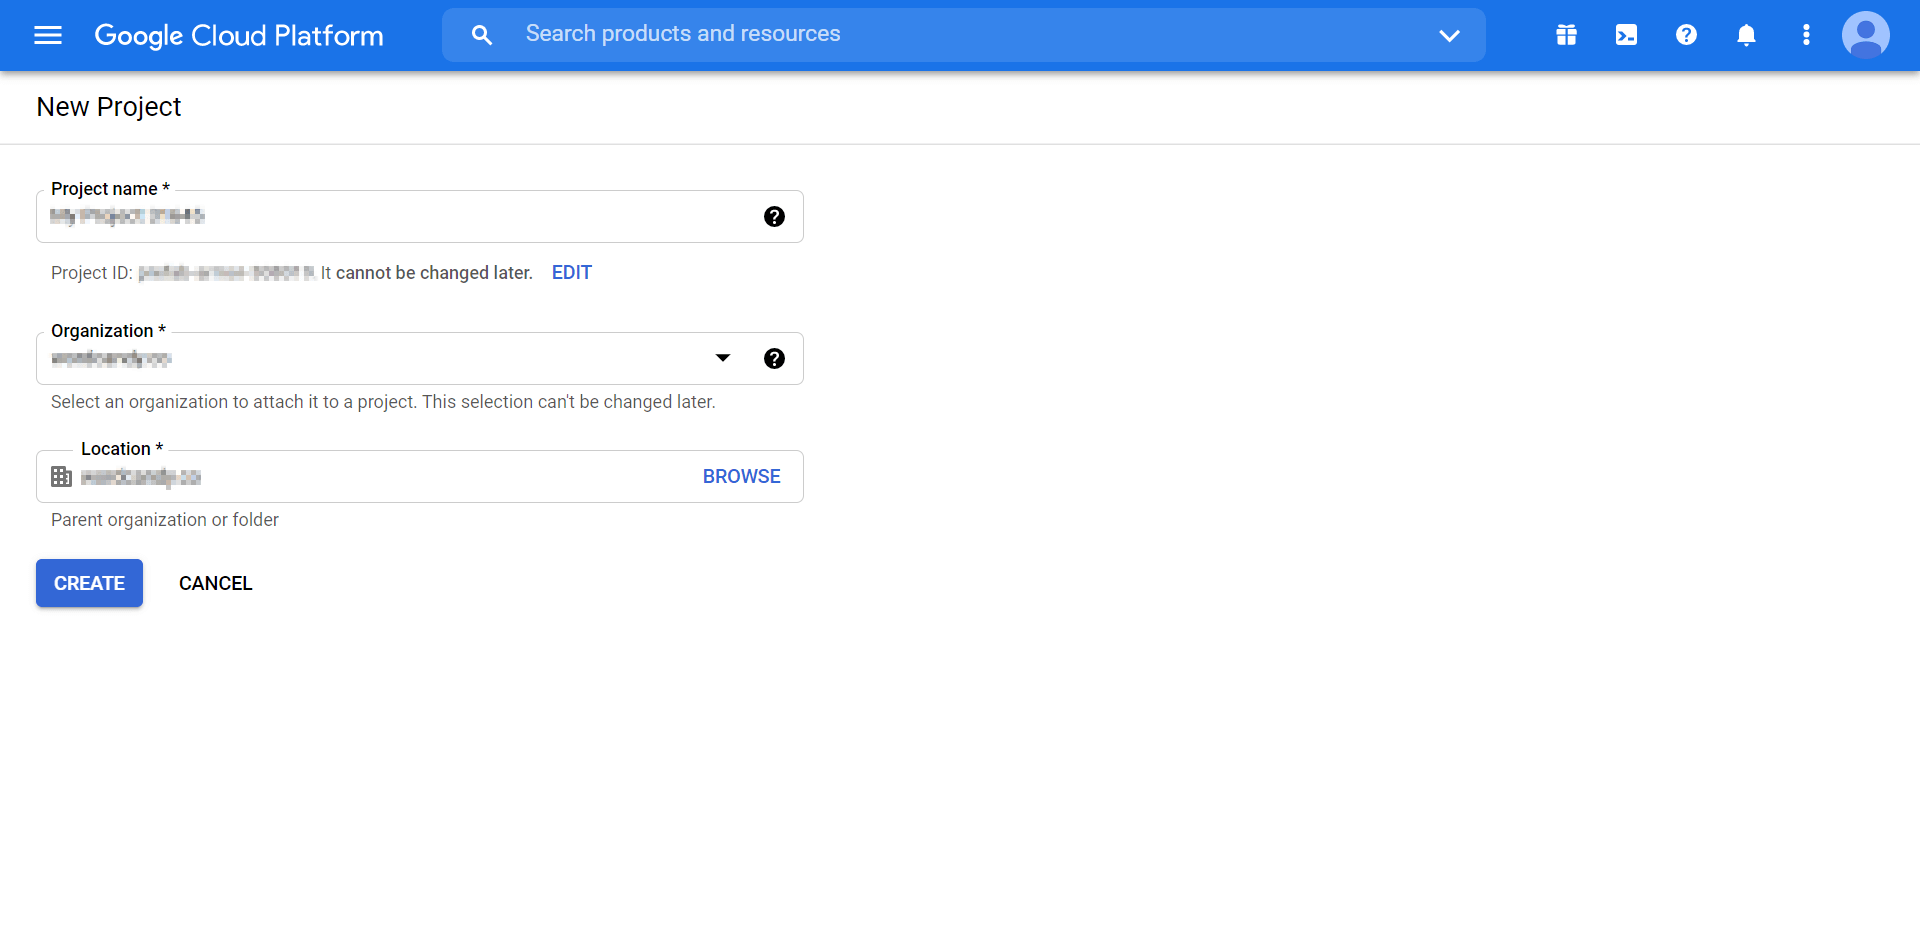
You need to provide a project name with some name and organization. You need to determine the parent folder if you are a project under the location field. Once you fill up the form, verify the details once and click on Create.
Step 3: Set Up OAuth Consent
To move on to the next step, you need to return to the Google Cloud Console dashboard. Navigate to the left-hand menu and select the OAuth consent screen.
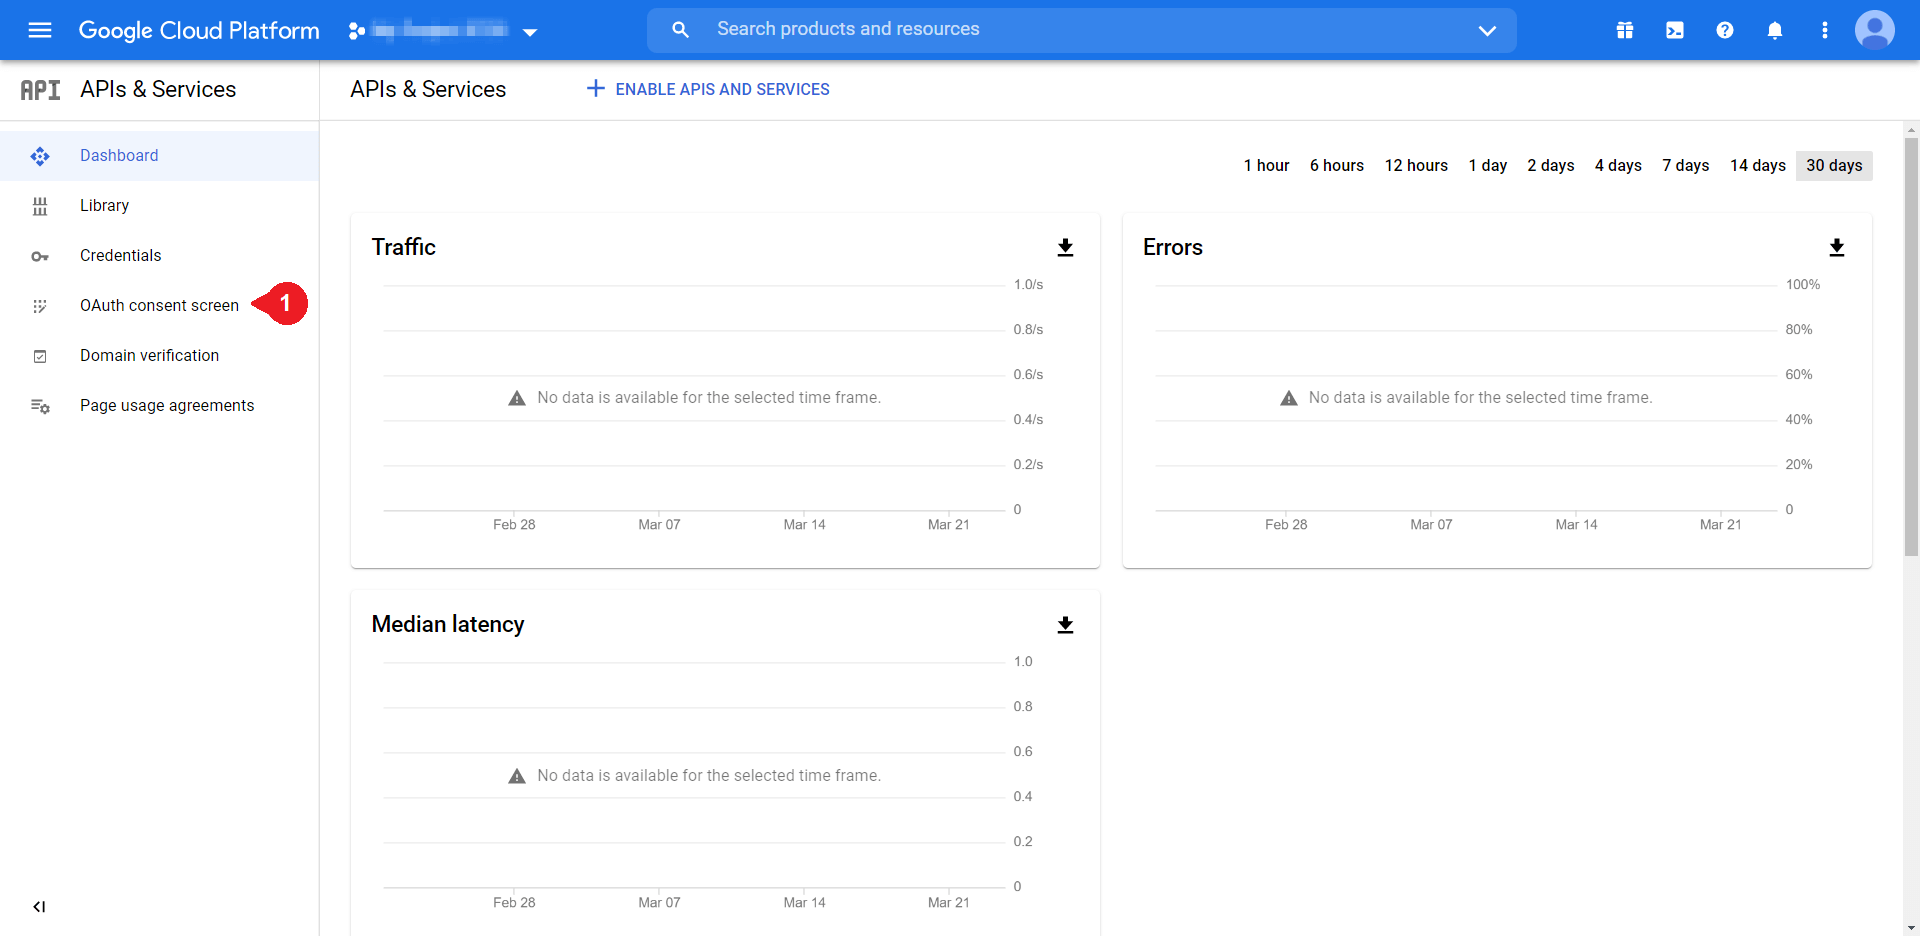
At this position, You will be taken to a screen to choose between the internal or External user types.
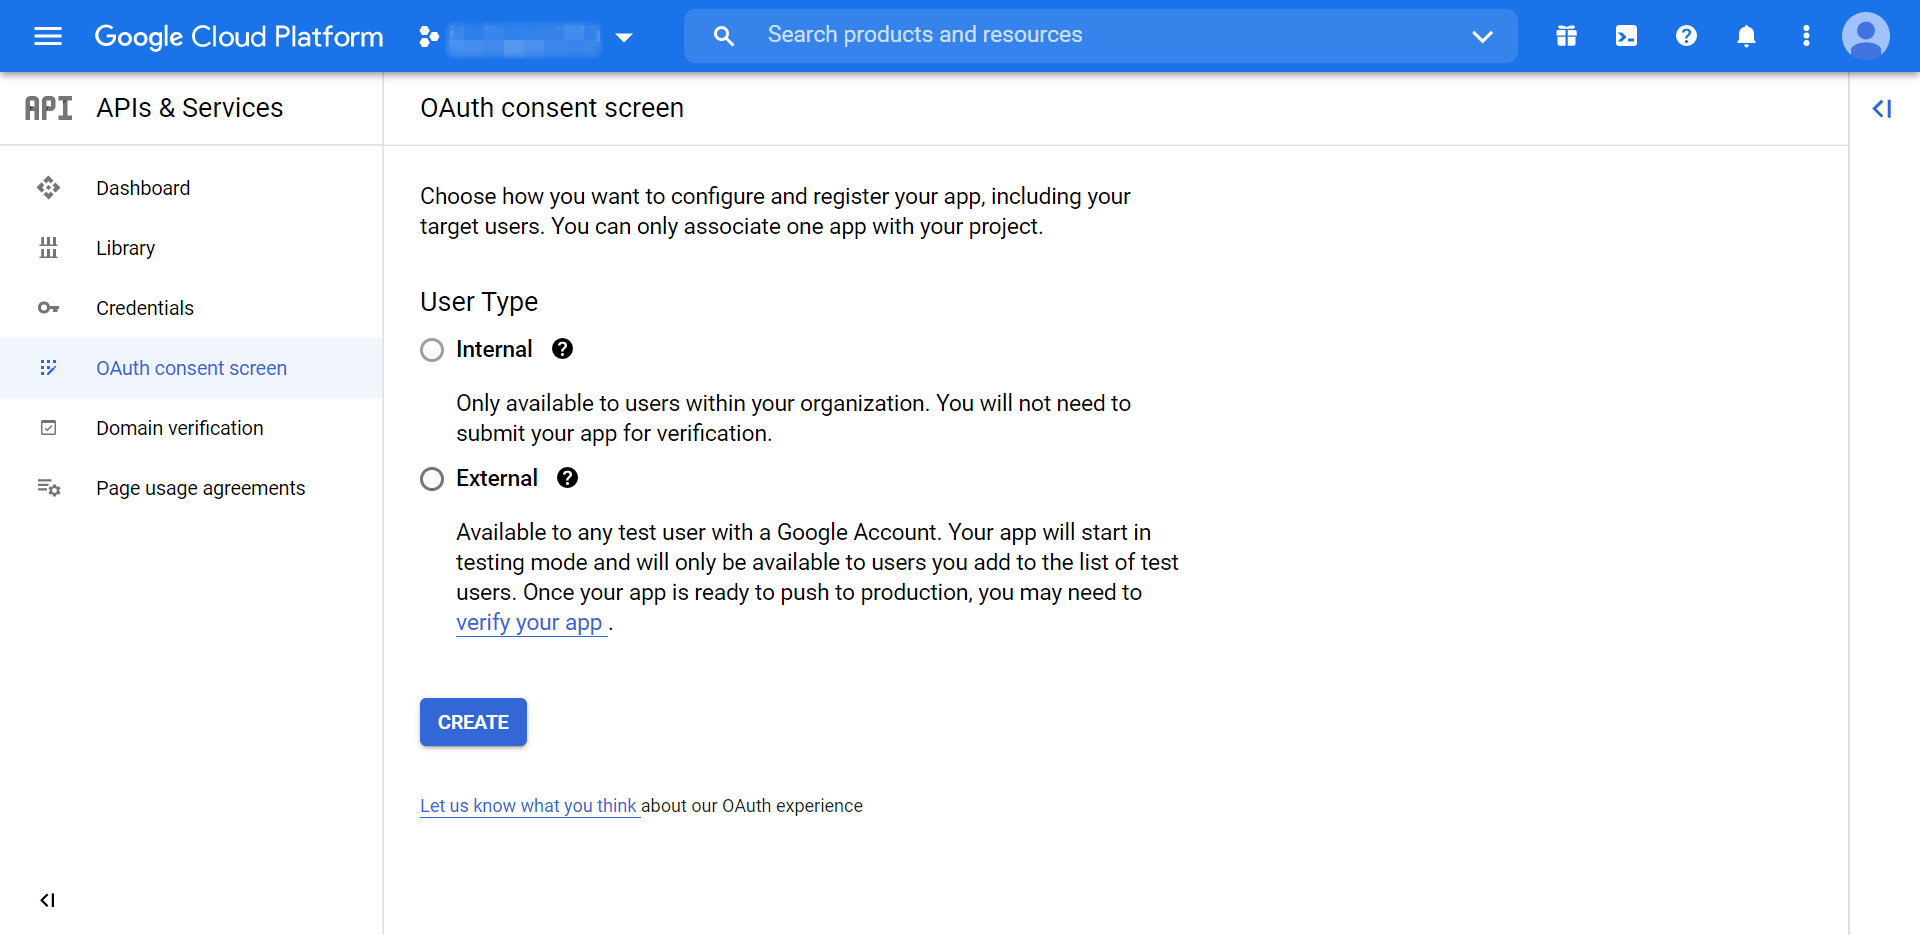
The Term “Internal” refers to the people within you are an organization, while “External” refers to those people who are out of the organization login. If you are not willing to use Google Workspace, you will only be able to choose External. Select you are preferred option and click on Create to move to the next step.
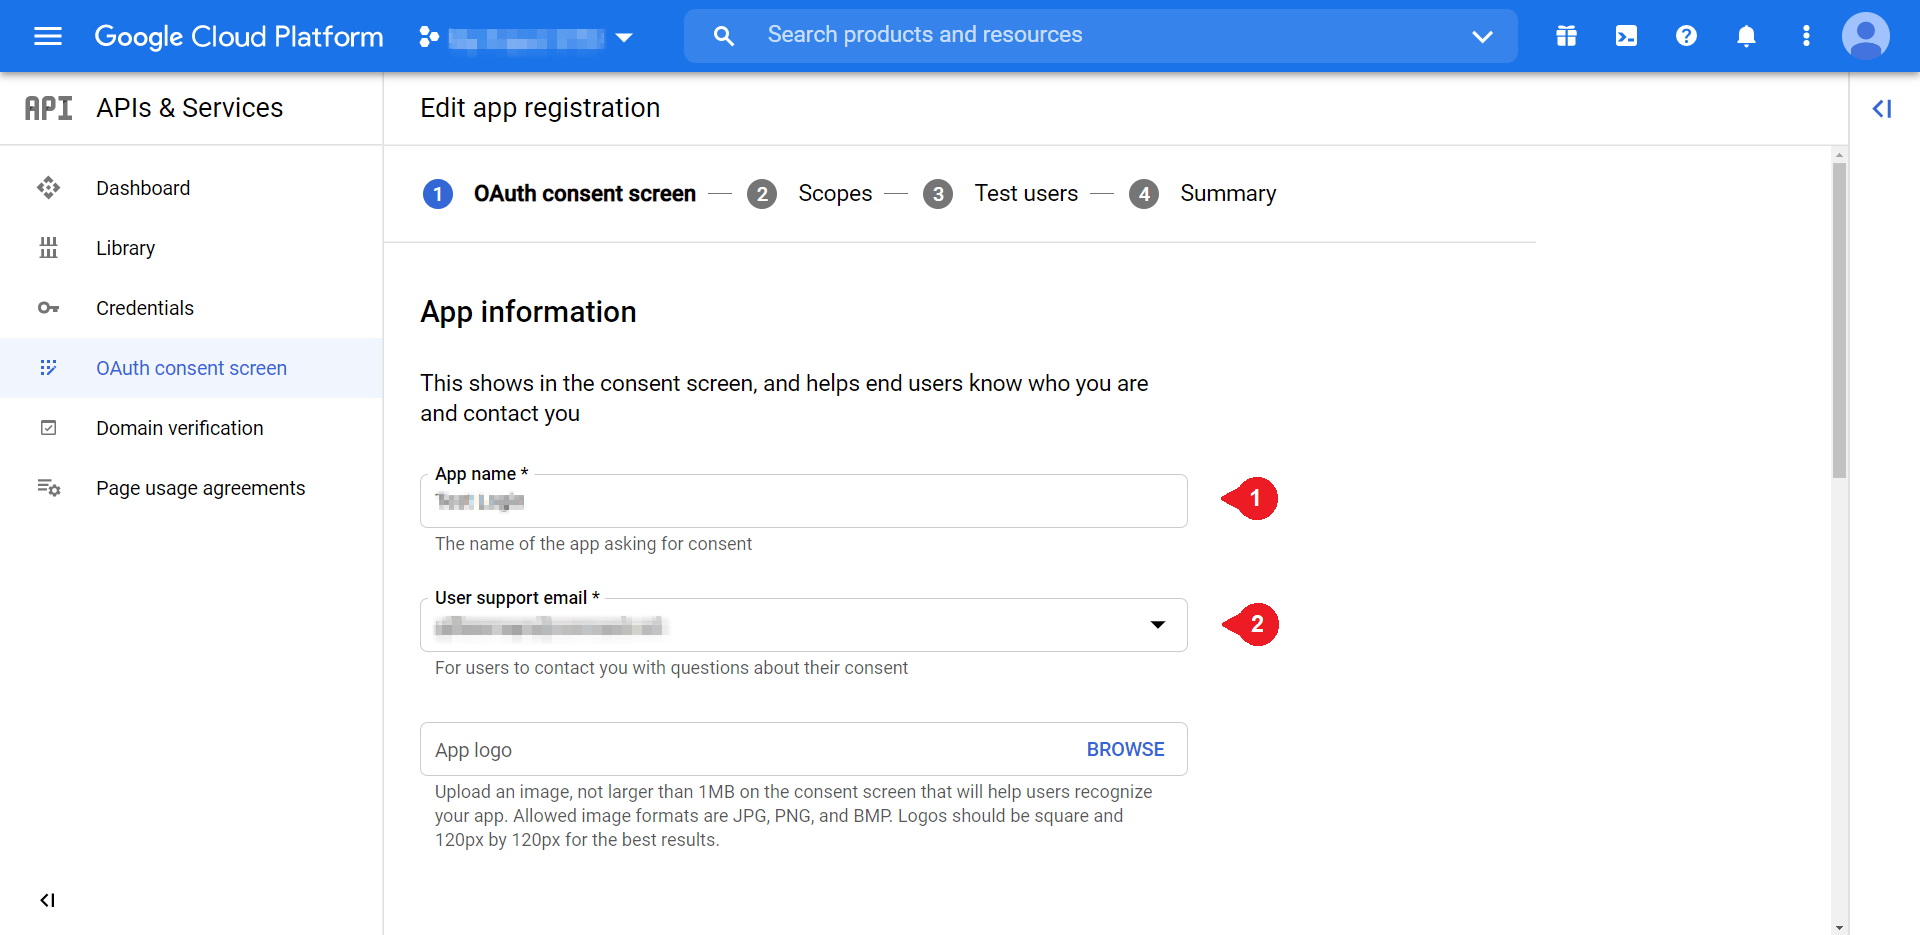
To start app registration, fill in the “App Name” and “User support email fields”. You can enter a name which helpful to you and also your relevant email. Also, fill in the developer contact information in which you need to mention the email address.
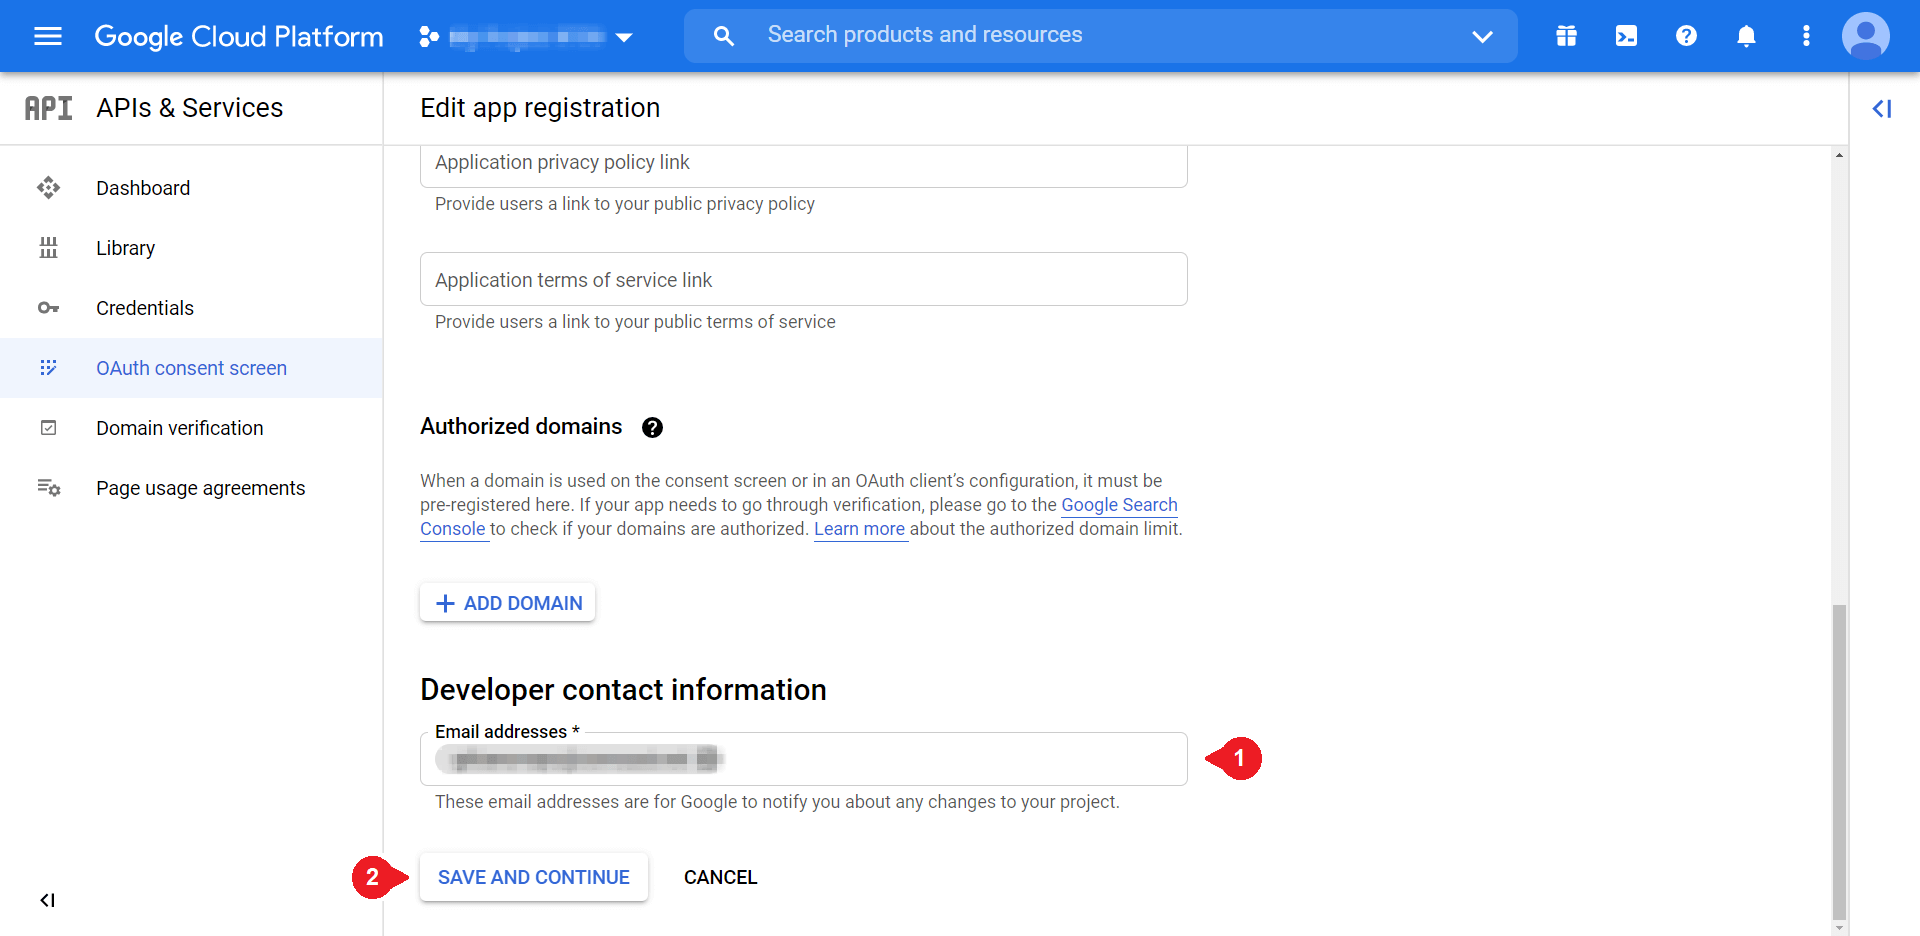
You can add the same email which is used as the support email. Once you check then click on “Save and Continue”. Then you can navigate to the menu placed on the left-hand and select “Credentials”.

Once you click on “Credentials”, on the next screen select “Create Credentials” > “OAuth client ID”.
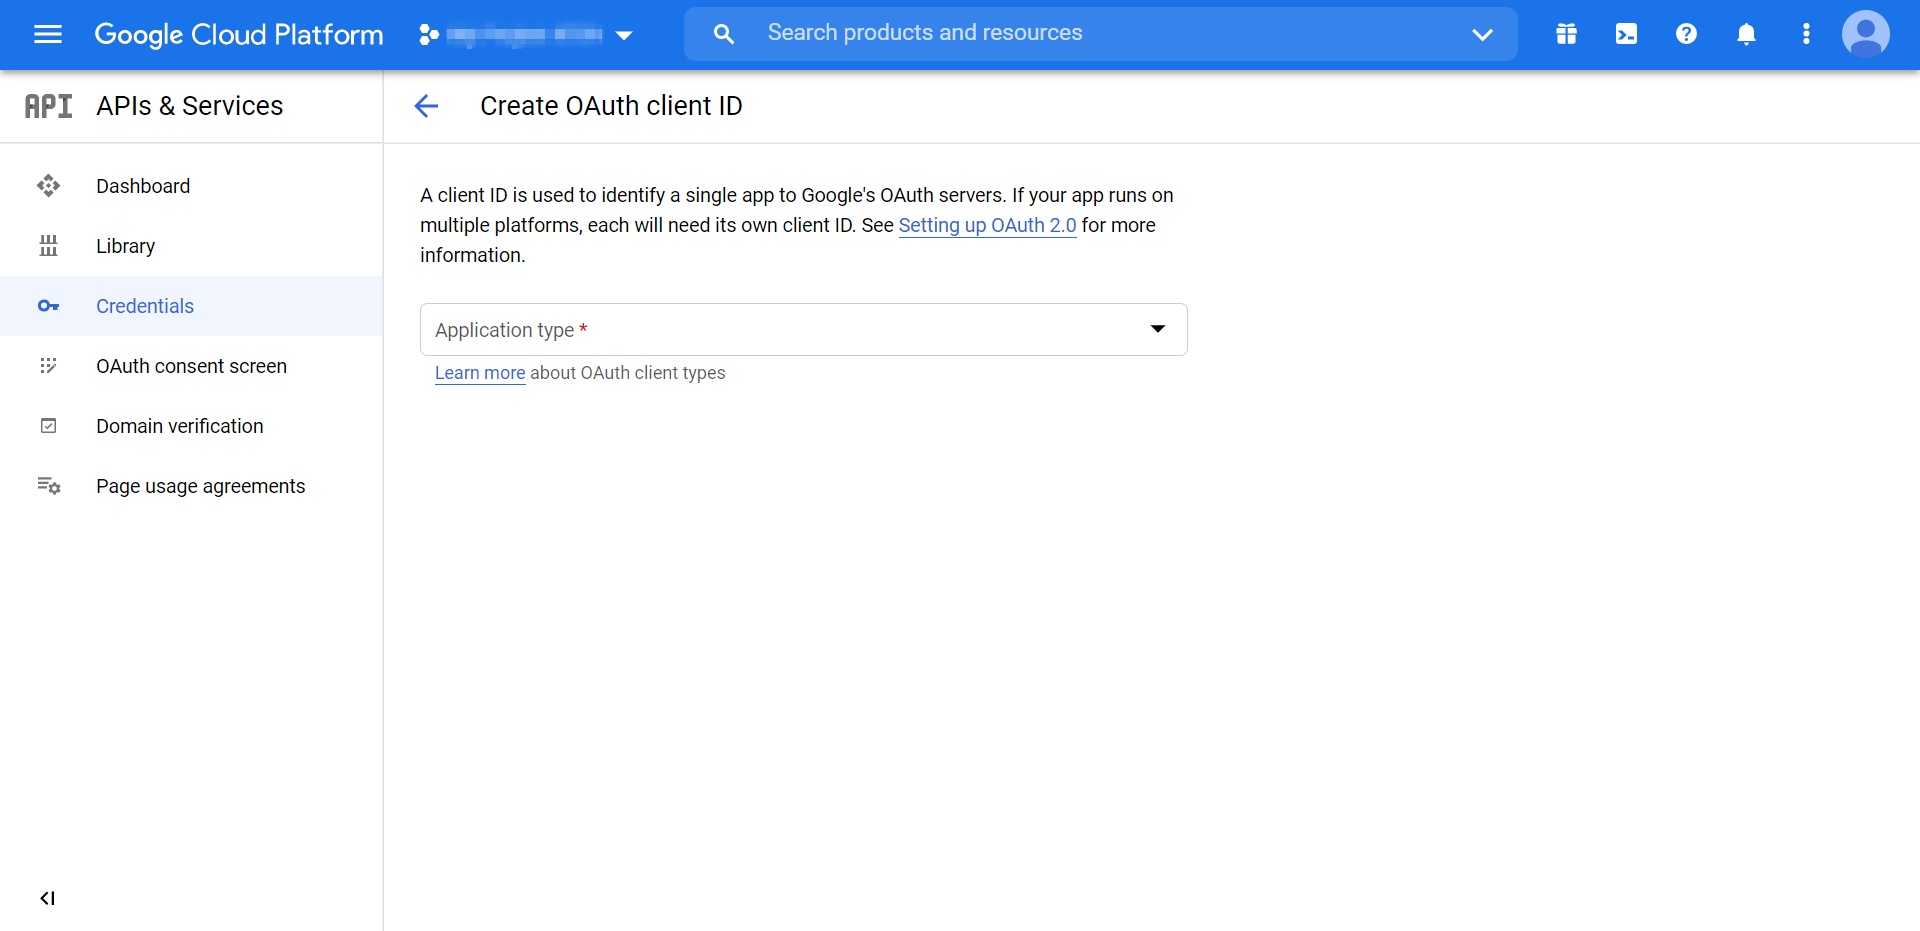
Choose the web application in the dropdown of the “Application Type”. Once you choose the application type it populates two more fields.
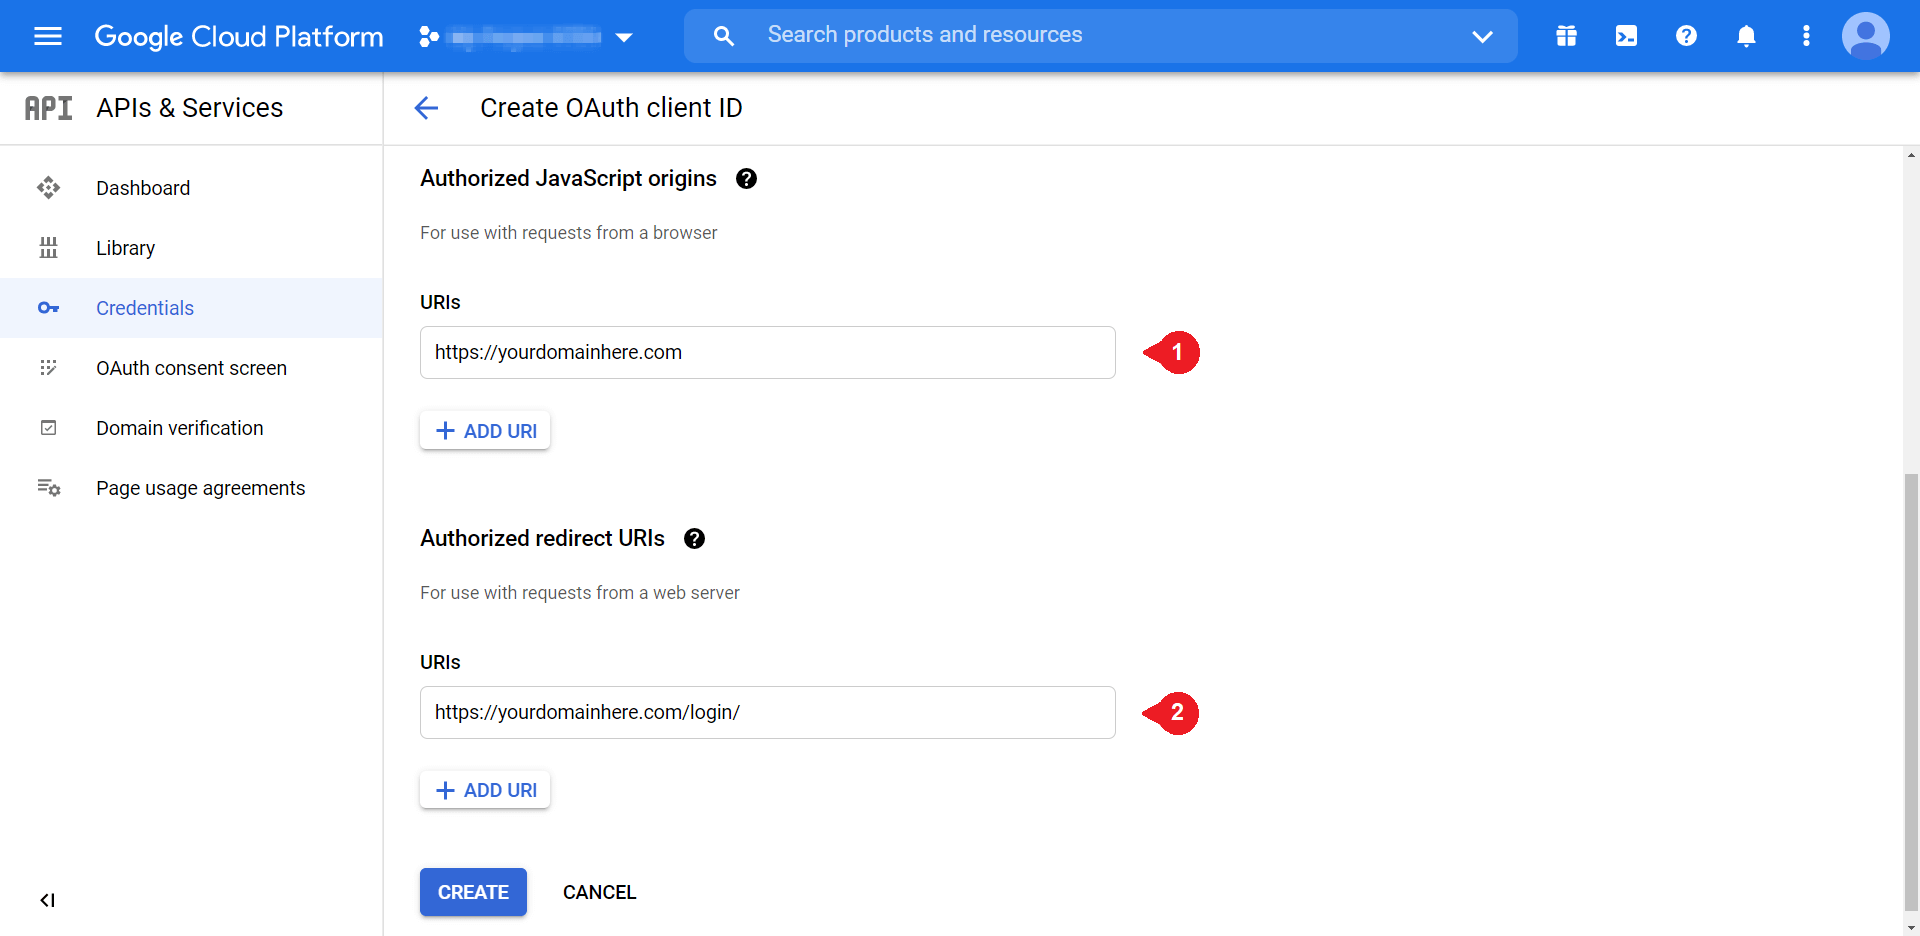
Under the Authorized JavaScript Origins field, you need to enter the domain as “https://domainname.com”. After that, you need to enter the site’s login URL under “Under Authorized redirect URIs”. Select “Create” once you complete. create_oauth_clients
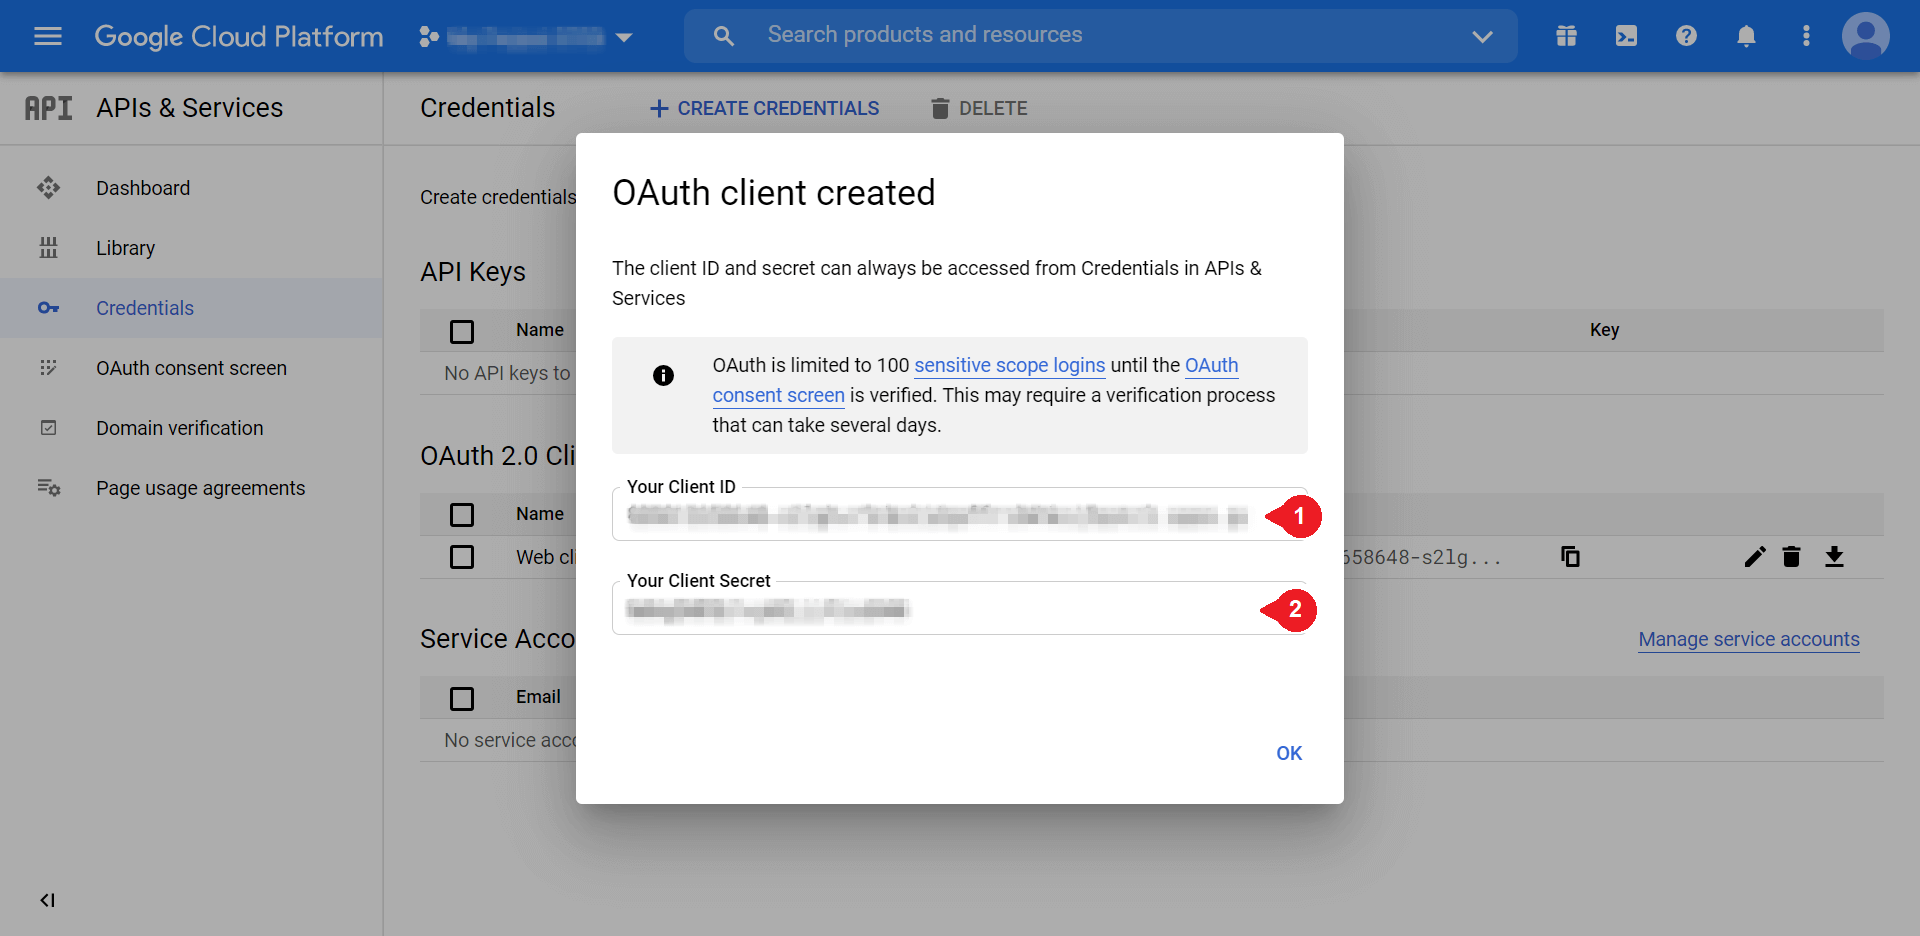
You will need these credentials to finish setting up your one-click login process, so consider having them handy. We need to use them in the last step.
Step 4: Customize Your Google Apps Login Settings
Finally, in the last step, you need to enter you are client ID and client Secret under the main setup. To see the below screen and to fill in the information, you need to navigate back to the WordPress site, access your plugin section, and navigate to the Google Apps Login.
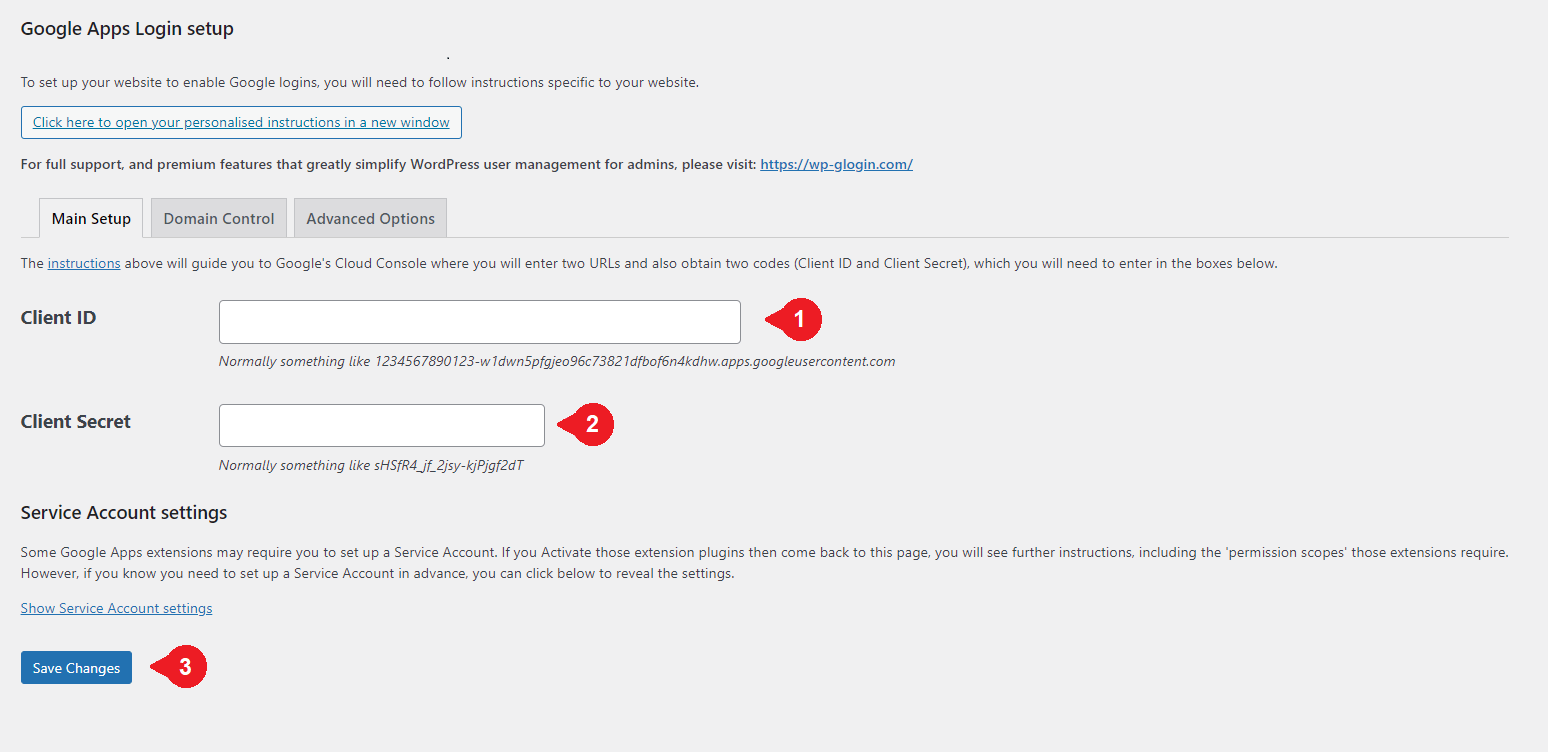
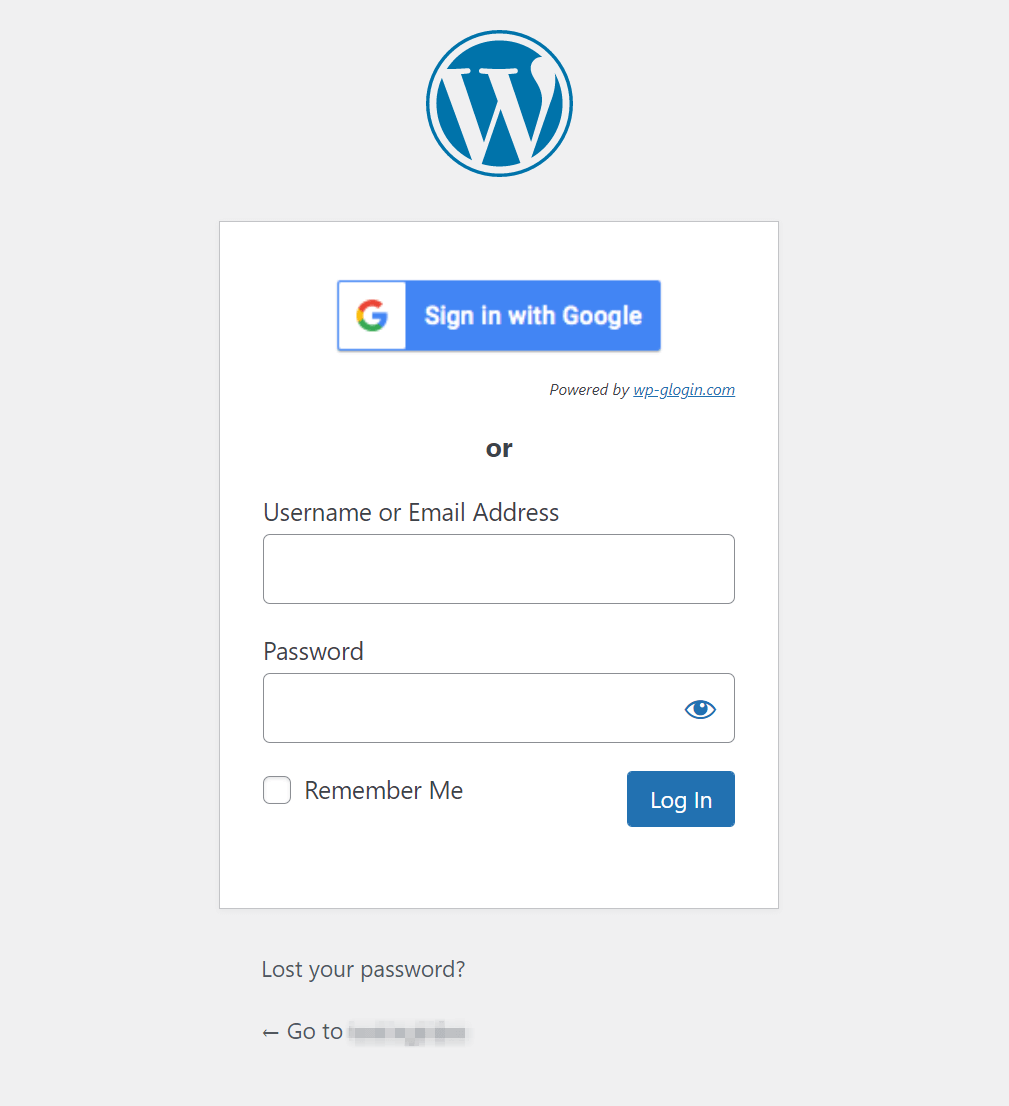
Enter the values received at step 3 into the corresponding fields and save your changes once done. To see the result of this hard work, log out from your WordPress account and navigate to the login screen. It will look like below. wordpress-login-gmail.
You can also check the “Advanced Options” provided in the Google Apps Login plugin.
 You can also provide the “Remember Me” option for the user. You can also customize the login screen by choosing the given design options.


